Contents
Activities Setup for Device and Access Manager

1 Activities on Advanced Device and Activities Manager
1.1 Setting up Activities
Before an activity can be assigned to the Smart biometric clock (T2), it needs to be imported. To do this open the Tools section via the menu on the left-hand side. The Resend clocking data and Activity code import features are displayed.
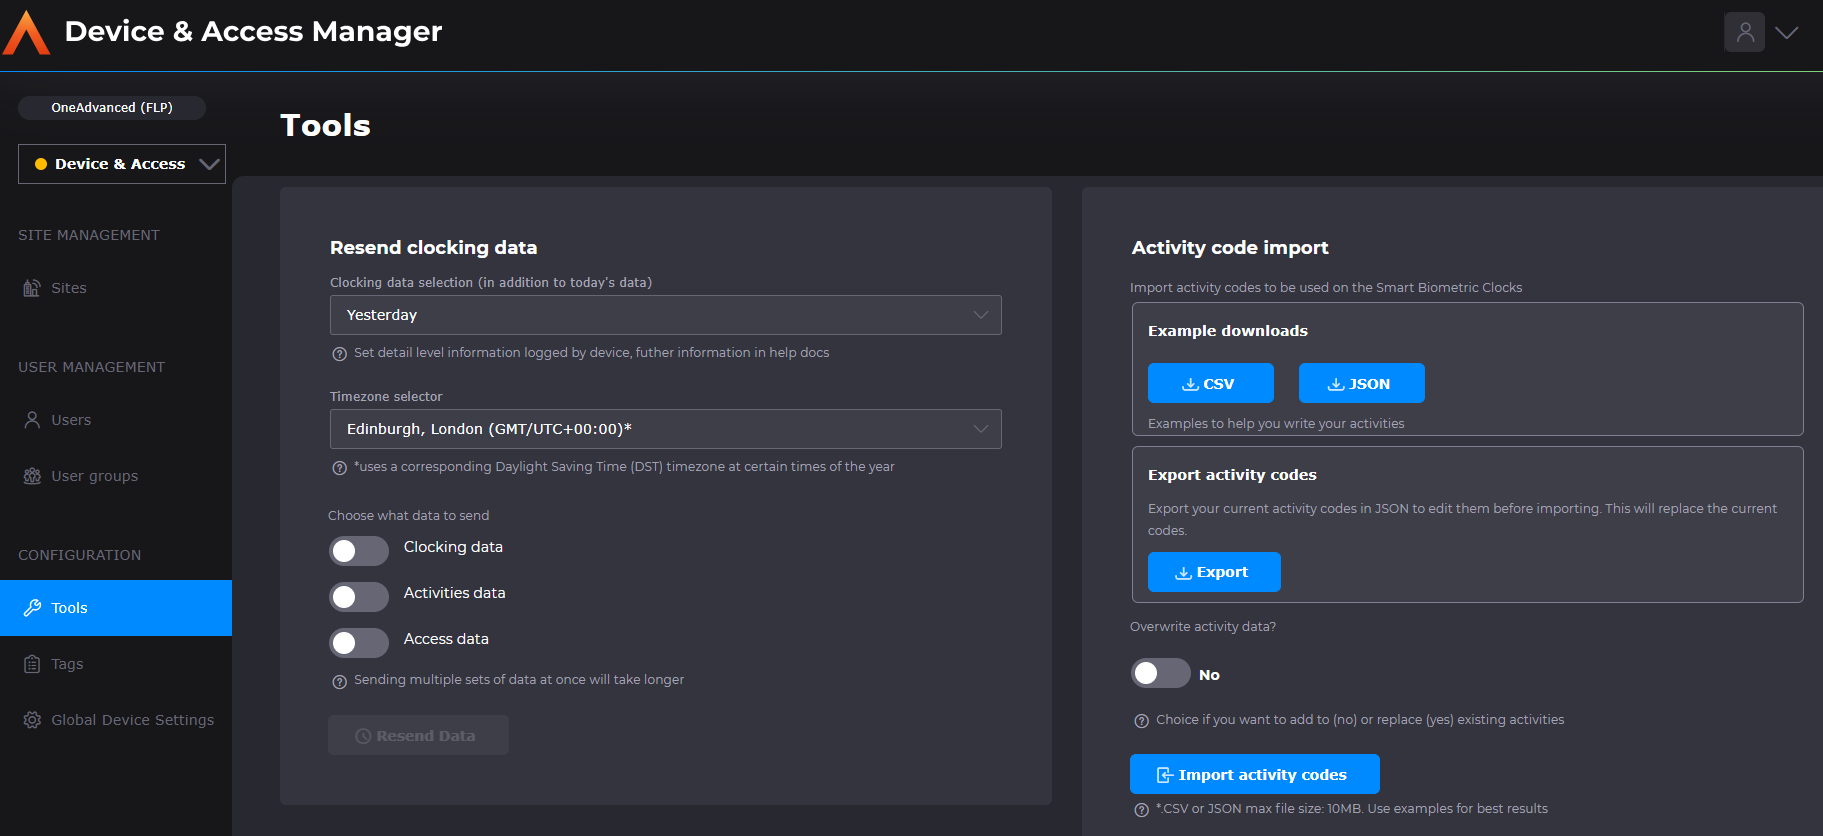
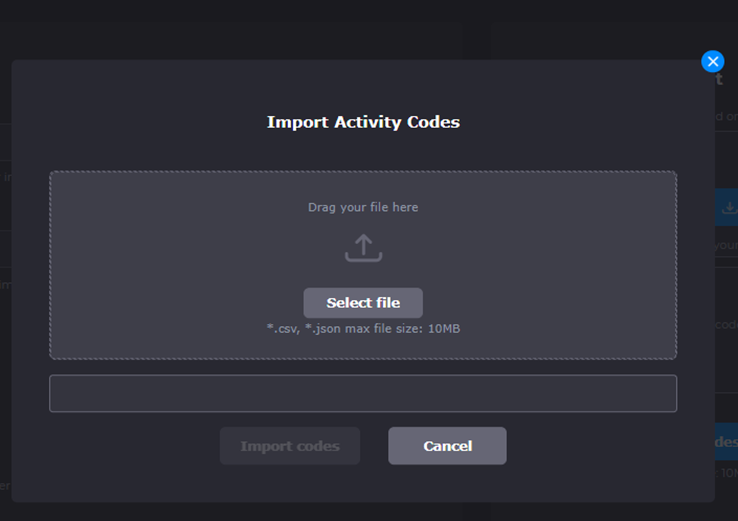
To import codes select the 'Import Activity codes' button. This opens a modal where you can select or drag and drop a CSV or JSON file. Example files can be downloaded.
If you wish to retain existing activities ensure that Overwrite activity data is set to No.

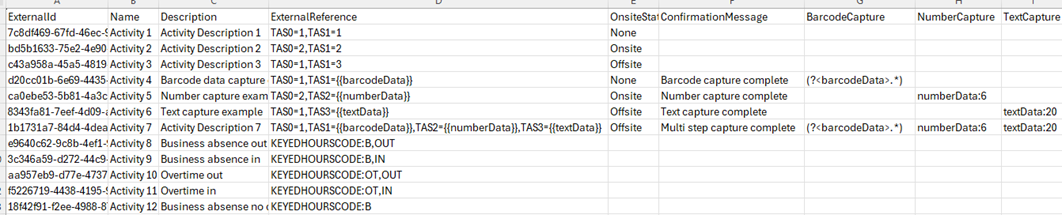
The CSV file will need to have the following 4 headers with the same capitalisations and no spaces on line 1 of the file. For example, ExternalId cannot be written as External Id or the import will not work.
(A Comma Separated Values (CSV) file is a plain text file that contains a list of data. Each row in the data represents a row on a table and each column of the table is separated by commas).
"ExternalId","Name","Description","ExternalReference" The data definition for each column of the CSV file
Column Name (Character limit) | Input Data Definition |
ExtenalId (200) | A unique ID assigned to every Activity |
Name (200) | The name of the Activity (minimum 1 character) |
Description (255) | A brief description of the Activity |
ExternalReference (200) | This is used for the configuration of TAS codes |
Example of file used to upload Activities

IMPORTANT: CSV files define columns with commas. Because of this when entering multiple TAS codes that are separated with commas you must ensure that the entire string is encapsulated in “ “. If this is not done correctly then the import will fail.
IMPORTANT: A copy of the original import file should be retained and used for subsequent imports. Using the original file new codes can be added to this import, codes no longer required can be removed and existing codes can be updated.
1.2 Assigning Activities
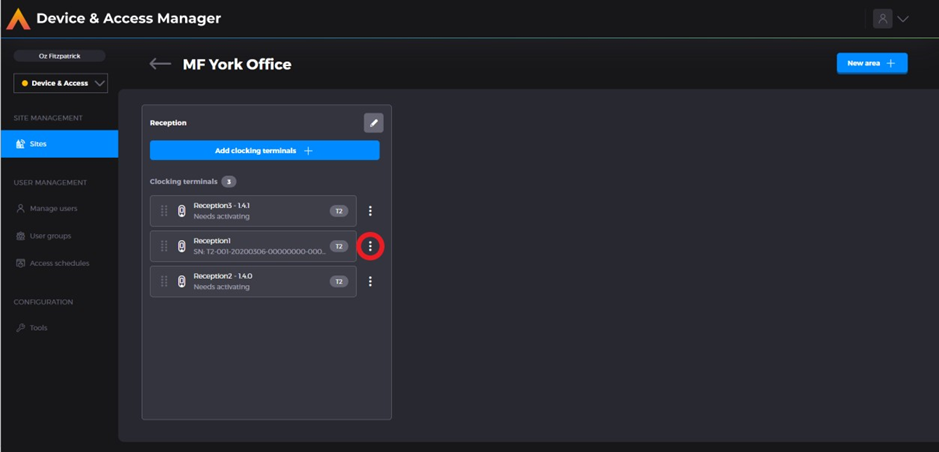
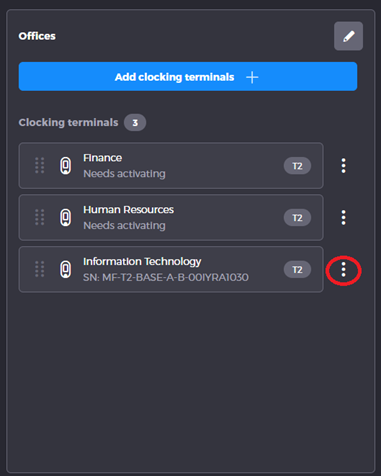
Once the Activities have been successfully imported, they can then be assigned to the Smart biometric clock (T2). To do this click the ⋮ on the Smart biometric clock (T2) that you want to assign the activity to (Sites > “Select a business location” > ⋮)
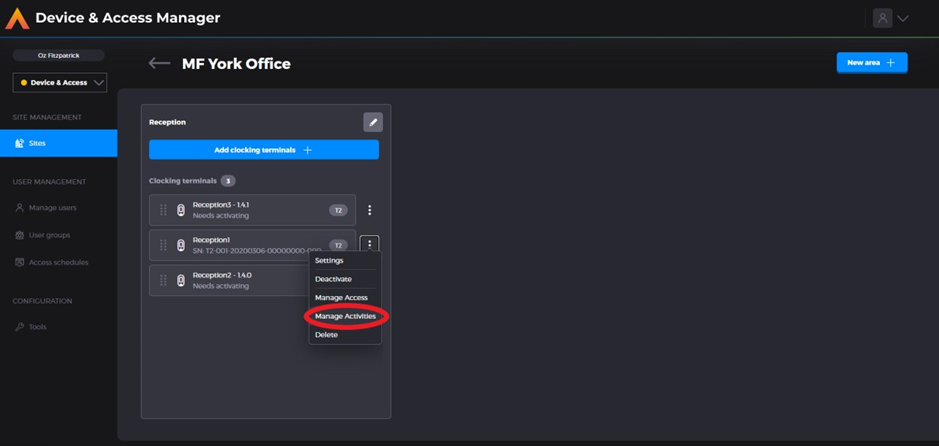
Click Manage Activities
This will open a list on the left-hand side of the screen with all the Activities available listed. The number to the right of the search bar reflects the total number of Activities. Users can scroll down and select the Activities they want to be assigned to that specific terminal. The menu will load in 20 activities and 20 more when the user scrolls to the 20th item on the list.
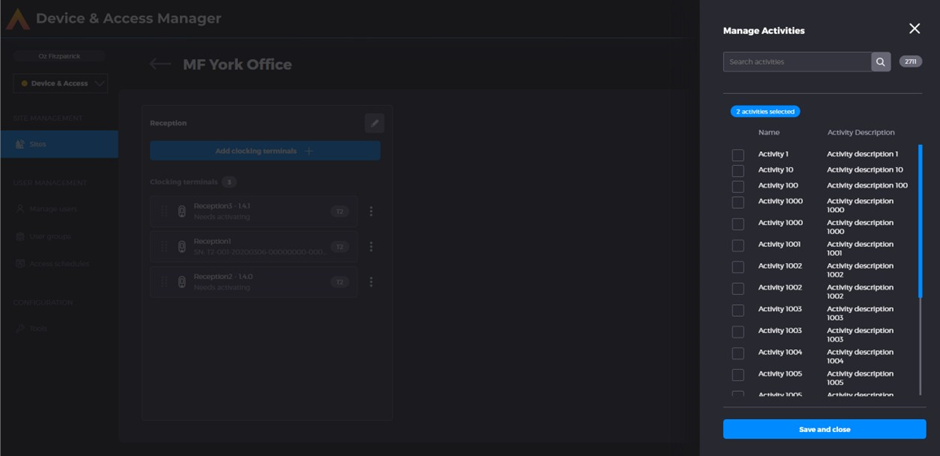
If the Business has many Activities, then a search can be used, the number to the right of the search bar will update to show the total number of search results.
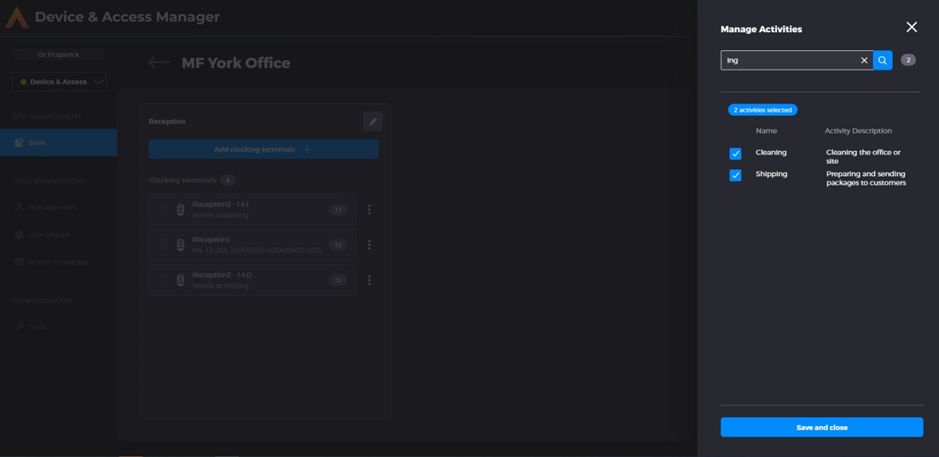
To save the Activities to the Smart biometric clock (T2) click “Save and close”
1.3 Enabling Activity buttons on T2 Device
From the Device and Access Manager portal select the required Smart biometric clock (T2) and click ⋮ against the device to access the settings
Select the Device screen and the desired Home Screen Layout Settings:

When each selection is made the Device screen will change as below:
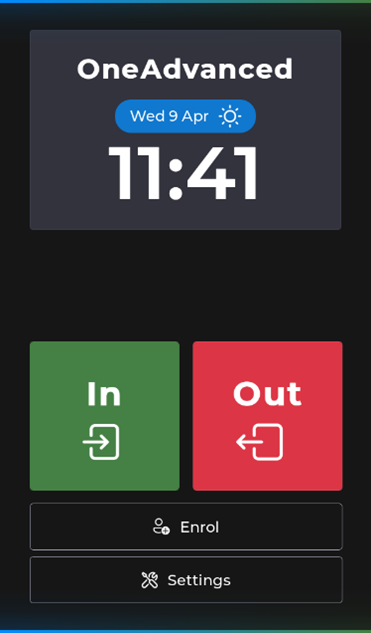
Figure 1: Example Screen when Clocking buttons selected on Home Screen Layout.
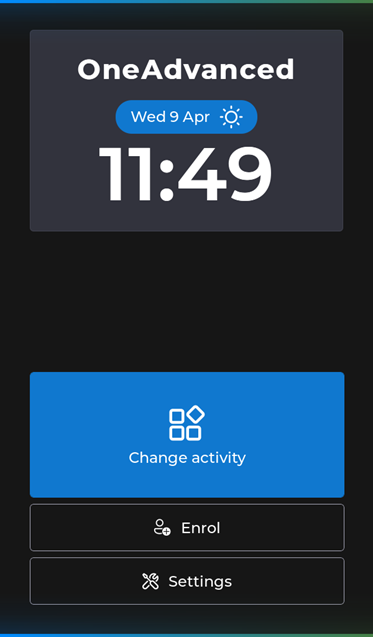
Figure 2: Example Screen when Activity buttons selected on Home Screen Layout.
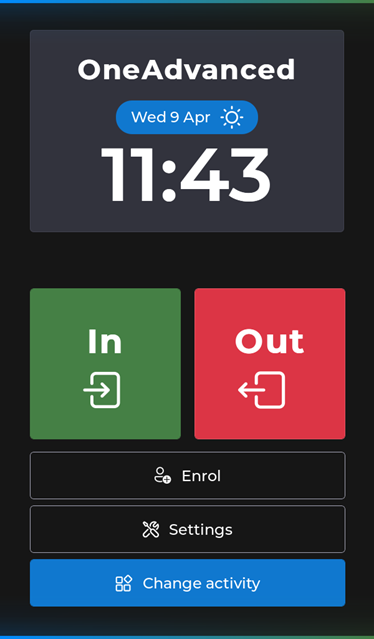
Figure 3: Example Screen when Clocking and Activity buttons selected on Home Screen Layout.
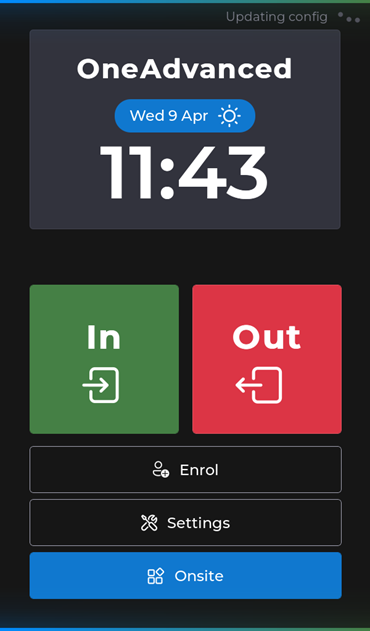
Figure 4: Example Screen when only one Activity code is available on a device.
1.4 Activities for Keyed absences
Activities can also be used to record keyed absences where an employee needs to leave a site on company business. They would be able to do an activity clocking for a business absence which would show them as offsite but still working.
The formatting of the import file is the same as described in section 1.1 except for the ExternalReference column. The format should be KEYEDHOURSCODE:HOURSCODE,DIR
E.g. for a T&A system that has the absence hours code B set up for a business absence and wants a clock out on business absence the string would be:
KEYEDHOURSCODE:B,OUT
T&A hours code must only contain alpha, numeric, punctuation or symbols (e.g. '$' , '!', '+', '/'). Separators are not allowed (e.g. ',', ';'). If an invalid code is imported it will not be processed by PeopleConnect.
Once activities with hours codes have been imported they can be assigned and used as described in section 1.2.
Activities will also work for keyed overtime using worked hours codes.
1.5 Activities for data capture
Activity data can include numbers or text information that is keyed in at a terminal.
To support this feature Firmware version 2.9.0 or above is required.
Data capture import files
To upload the appropriate Activity codes, download either a CSV or a JSON file from the Tools feature (see section 1.1).
If there are existing Activity codes these can be edited or added to by downloading a JSON file. This file can be easily edited and then imported back into the system.
Note: Barcode/QR Scanning capabilities is factored into the new file formats but not supported yet.
Example of CSV file
Example of JSON File
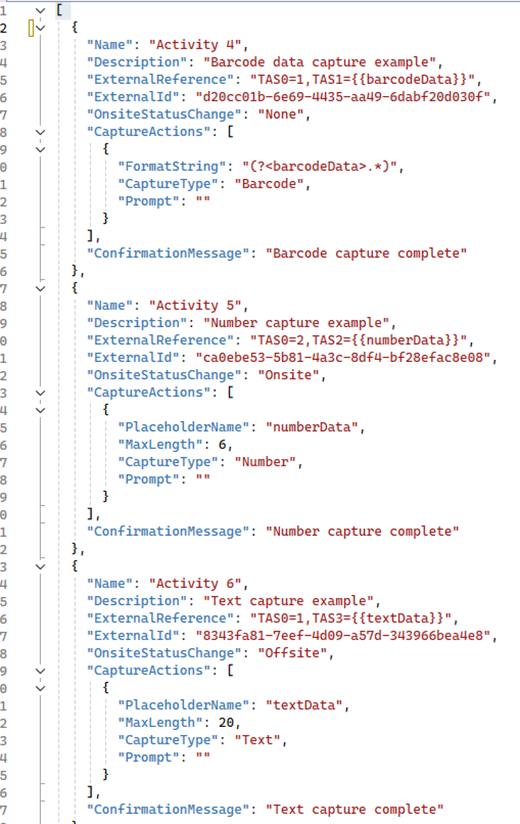
Import format
Column Name (chars) | Input Data Definition |
ExtenalId (200) | A unique ID assigned to every Activity |
Name (200) | The name of the Activity |
Description (255) | A brief description of the Activity |
ExternalReference (200) | This is used for the configuration of TAS codes. May include placeholders for barcode data |
ConfirmationMessage (255) | The message to show on starting the activity. May include placeholders for barcode data |
ExternalReference placeholders
Use double braces {{ }} to define placeholders in the ExternalReference and ConfirmationMessage fields.
We support named placeholders, giving good readability and allowing complex expressions to be constructed. The default placeholder will be named data, as set up in the default configuration on the portal.
Field value | Extracted data | Result |
TAS0={{data}} | 123456 | TAS0=123456 |
TAS0=6,TAS1={{data}} | 55 | TAS0=6,TAS1=55 |
TAS0={{Animal}},TAS1={{Food}} | Horse, Hay | TAS0=Horse,TAS1=Hay |
TAS0={{Surname}},TAS1={{Forename}} {{Surname}} | Bond, James | TAS0=Bond,TAS1=James Bond |
ReaderFormatString
We support regular expressions as the reader format, instead of the legacy *s and ?s.
The default value for this field in the portal should be (?<data>.*) which will extract all data into a single field called data.
Data | Format | Result |
ProductionPacking | (?<data>.*) | ProductionPacking |
ProductionPacking | (?<Data>……) | Produc |
ProductionPacking | (?<Data>……)$ | acking |
ProductionPacking | ^..(?<Site>..)..(?<Badge>......) | Site=od, Badge=tionP |
Examples
Barcode contains customer code, sent as TAS transaction
Input | |
ExternalReference | TAS0={{data}} |
ConfirmationMessage | Job recorded against customer {{data}} |
ReaderFormatString | (?<data>.*) |
Barcode data | 168367 |
| |
Output | |
ExternalReference | TAS0=168367 |
ConfirmationMessage | Job recorded against customer 168367 |
Barcode contains customer code, inserted into TAS transaction
Input | |
ExternalReference | TAS0=14,TAS1={{data}} |
ConfirmationMessage | Painting recorded against customer {{data}} |
ReaderFormatString | (?<data>.*) |
Barcode data | 35 |
| |
Output | |
ExternalReference | TAS0=14,TAS1=35 |
ConfirmationMessage | Painting recorded against customer 35 |
QR code contains customer code, inserted into TAS transaction
Input | |
ExternalReference | TAS0=4,TAS1={{customer}} |
ConfirmationMessage | Repair recorded for {{customer}} |
ReaderFormatString | $..(?<customer>.*); |
Barcode data | enMicrosoft;728272;2024-12-09 |
| |
Output | |
ExternalReference | TAS0=4,TAS1=Microsoft |
ConfirmationMessage | Repair recorded for Microsoft |
QR code contains job details, split and create TAS transaction
Input | |
ExternalReference | TAS0={{customer}},TAS1={{date}},TAS2={{task}} |
ConfirmationMessage | Repair logged for {{customer}} on {{date}} |
ReaderFormatString | $..(?<customer>.*);(?<task>.*);(?<date>.*) |
Barcode data | enMicrosoft;728272;2024-12-09 |
| |
Output | |
ExternalReference | TAS0=Microsoft,TAS1=2024-12-09,TAS2=728272 |
ConfirmationMessage | Repair logged for Microsoft on 2024-12-09 |
QR code contains raw TAS transaction
Input | |
ExternalReference | {{data}} |
ConfirmationMessage |
|
ReaderFormatString | (?<data>.*) |
Barcode data | TAS0=Microsoft,TAS1=2024-12-09,TAS2=728272 |
| |
Output | |
ExternalReference | TAS0=Microsoft,TAS1=2024-12-09,TAS2=728272 |
ConfirmationMessage |
|
QR code contains hours code for off-site work
Input | |
ExternalReference | KEYEDHOURSCODE:{{data}},IN |
ConfirmationMessage | Clocked out on business: {{data}} |
ReaderFormatString | (?<data>.*) |
Barcode data | OT1 |
| |
Output | |
ExternalReference | KEYEDHOURSCODE:OT1,IN |
ConfirmationMessage | Clocked out on business: OT1 |
Activity Data capture on terminals
Once a user has selected to clock using an activity the list of activities will be displayed and one which require data input are marked accordingly.
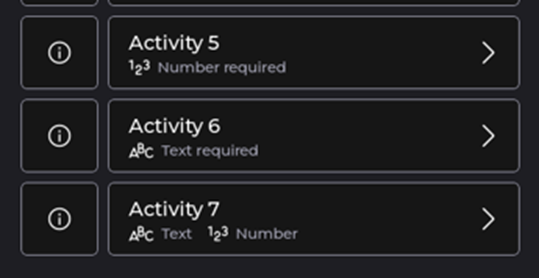
Figure 1: list of data input activities.
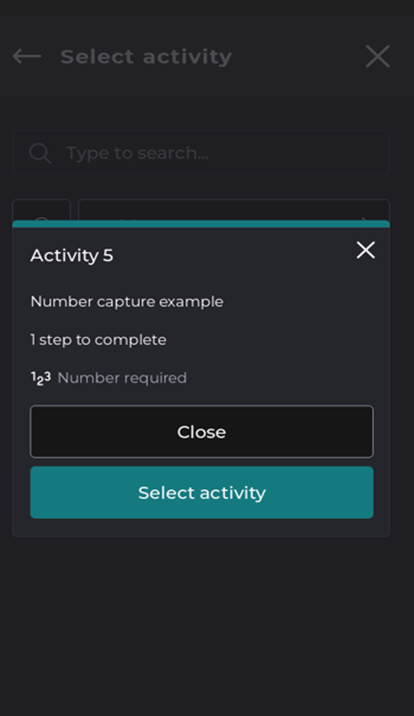
Figure 2: details of number activity.
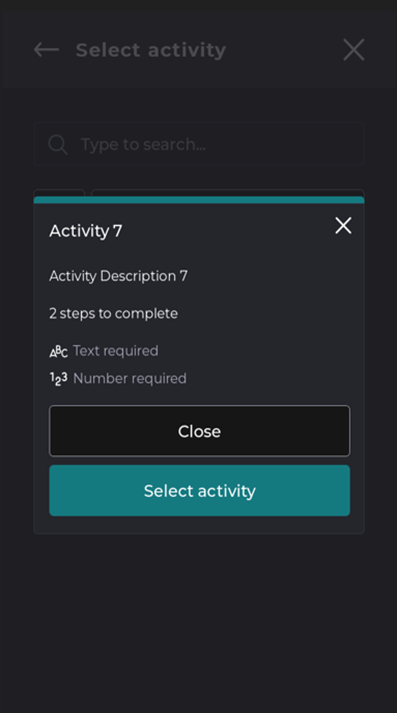
Figure 3: details of text and number activity.
When a data activity is selected a data input screen will be displayed which will allow the User to key in the appropriate numbers or text.
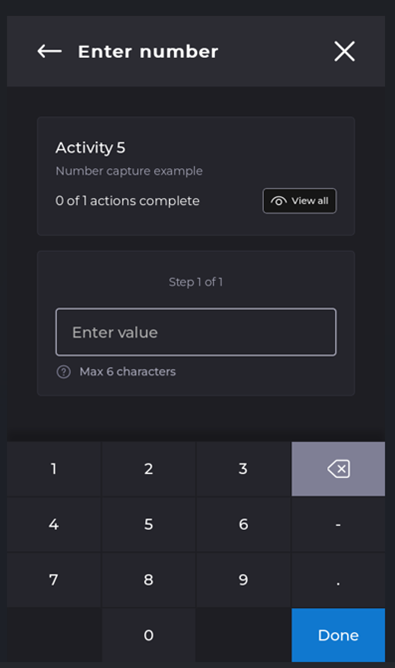
Figure 4: Number Entry screen on Device.
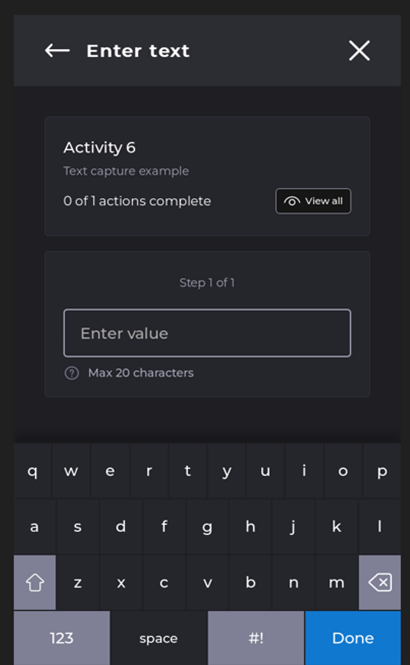
Figure 5: Text Entry screen on Device.
Details of actions can be viewed by selecting the view all button. The number of steps is displayed and any data that has been keyed in.
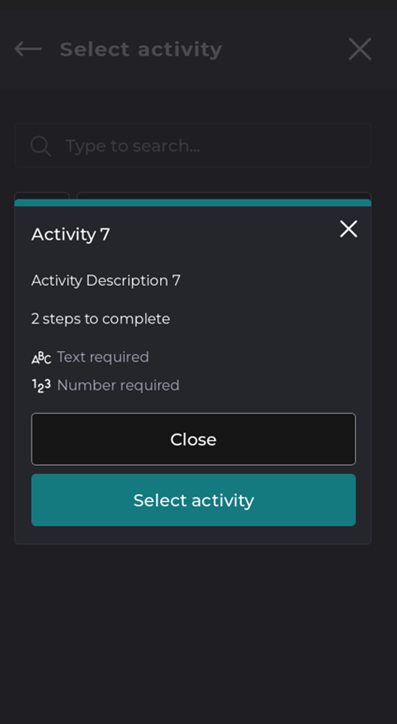
Figure 6: Steps information modal no data input on device.
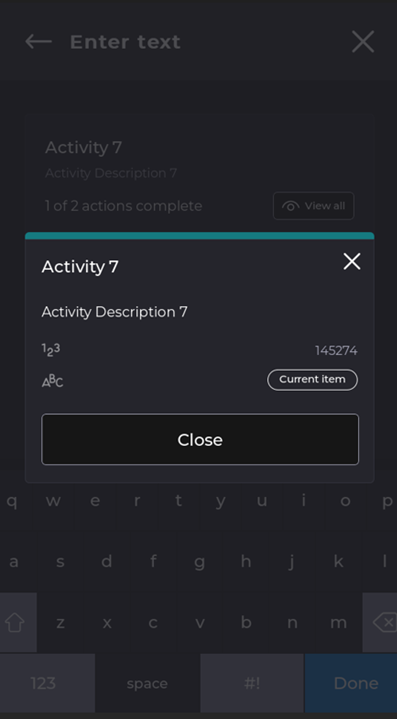
Figure 7: Steps information modal step 1 complete on device.
When the user has completed the data fields the 'Done' button is selected and a success message is displayed which confirms what data has been added. This message is generated for each step in the activity.
Once all steps have been completed an activity success screen will be displayed. This screen includes the confirmation message that can be customised in the import file.
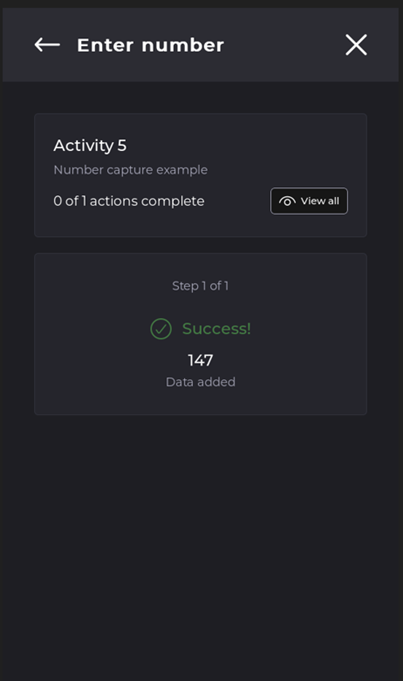
Figure 8: Success screen on device.
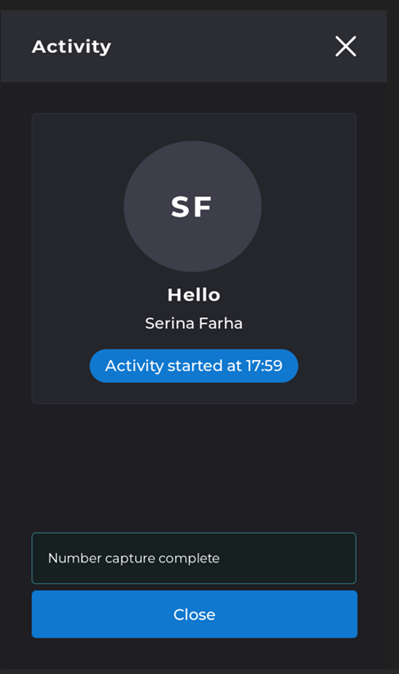
Figure 9: Activity success screen on device.