Managing Terminals

Managing Terminals
Terminals are the physical devices that are managed in Areas. It is here that a Terminal is assigned to an Area, and where you can manage them. Terminals can be assigned to specific Areas, named, reorganised and set up using this page.
1.1 Adding a Terminal
You can add a new Terminal to an Area by clicking the Add clocking terminal button in an Area. A new Terminal will appear – name it by typing a name into the text box provided, and press enter or click the blue tick to save the new Terminal.
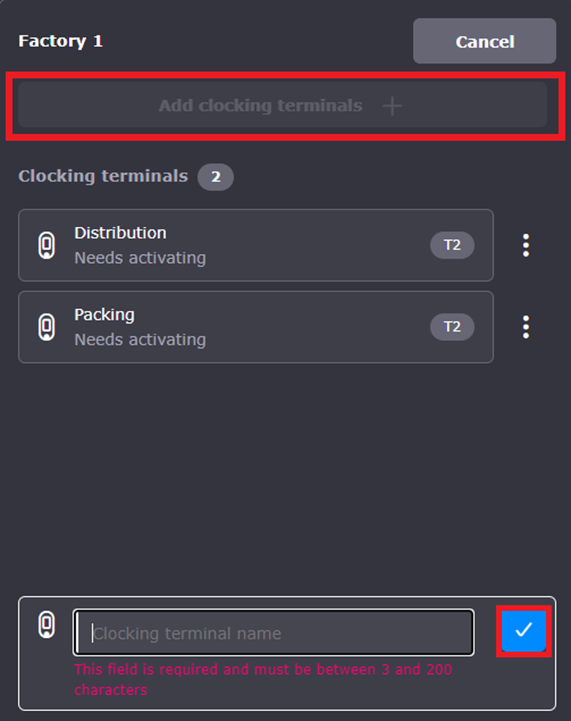
When a Terminal is added to Device and Access Manager, it will need to be paired with the physical device. This is normally done by an engineer when installing a Terminal at your site, but a Terminal is paired using an Engineer PIN, which can be found in the Settings of the Terminal. If a Terminal is not paired, Device and Access Manager will show that the Terminal "Needs activating", as demonstrated in the screenshot above.
1.2 Linking an Engineering PIN
To link an Engineering PIN between a Smart biometric clock (T2) and Device and Access Manager, you will need to open the Menu on a Smart biometric clock (T2), where you will be shown a page that requests an Engineer pin. This is the Engineering PIN found in the Settings page for the Terminal.
Type in the PIN in the box provided, using the on-screen keyboard, and click Done. A short connection screen will show, where the Smart biometric clock (T2) connects itself to Device and Access Manager, and then a verification screen will appear. If the connection is unsuccessful, double check that you are typing the PIN correctly. If it still does not work, then the PIN will need to be taken from Device and Access Manager again.
1.3 Managing Terminals
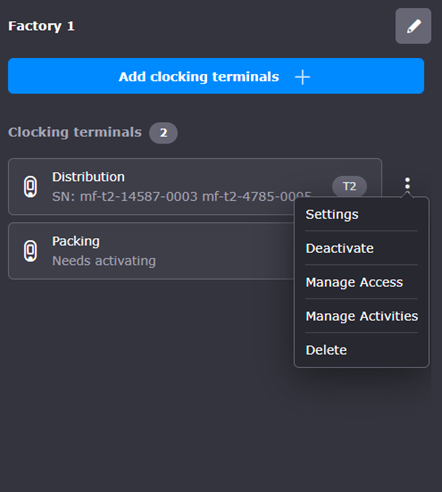
To edit an existing Terminal, click the Terminal's name or the kebab menu (three dots) next to the Terminal. A menu will appear with these options:
· Settings allow you to change the preferences of the Terminal
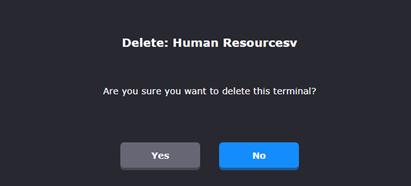
· Delete removes the Terminal from the Area. Once selected, a confirmation pop-up will appear. Click Delete on this pop-up to confirm the deletion.
· Deactivate if the terminal is active then the Deactivate option will be available.
1.4 Replacing Terminals
Occasionally, you may need to replace your Smart biometric clock (T2) with another physical device but want to keep the same settings – for example, if a Smart biometric clock (T2) has been damage and needs to be replaced. In situations like these, the new Smart biometric clock (T2) needs to be paired with the old Smart biometric clock (T2) entry on Device and Access Manager. In this situation, the online ‘profile’ of a Smart biometric clock (T2) (known as the Terminal on Device and Access Manager) is saved, and then imported onto a new Smart biometric clock (T2).
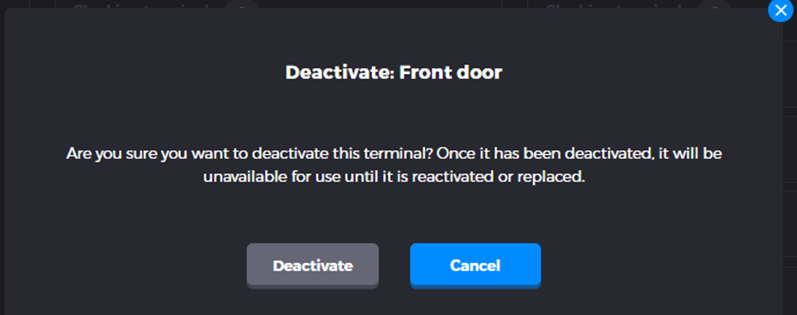
To Deactivate the Terminal, open the kebab menu (three dots) on the desired Device/Terminal, and select Deactivate.
A pop-up confirmation will appear, that will tell you that the Terminal will not be able to be used until it has been reactivated. Select Deactivate to continue:
The Terminal will then be saved, but will not be paired with a device, and be unavailable for use. Its entry within the Area will have a status of ‘Needs activating’.
At this point, a new Engineer PIN will be generated – this can be found in the Engineering PIN section of the Terminal’s Settings page. The Smart biometric clock (T2) can then be connected to the Terminal on Device and Access Manager, following the process outlined in Linking an Engineering PIN.
Once the Smart biometric clock (T2) has been linked with the Engineering PIN, it will be ready for use again.